How to Generate a Customer Contracted Price with Salesforce CPQ
A Customer Contracted Price enables you to create a customer-specific price for a product or a group of products. This ensures that when a customer returns to purchase additional quantities of a product, they will receive the agreed upon price. For organizations that establish contract prices, this feature will instill confidence in your customer that you will always provide them with accurate pricing automatically. As an added benefit, it will also increase productivity for your sales reps who will no longer need to spend valuable selling time searching for the customer’s contracted price when asked for a quote.
Creating a Customer Contracted Price was previously a simple but manual process with Salesforce CPQ, and like any manual process, it could be missed. However with SteelBrick’s (now known as Salesforce CPQ) Spring 16 Release, a slick new feature enables the automatic creation of a Customer Contracted Price with a setting on the Quote Line.
Do it in 3 easy steps!
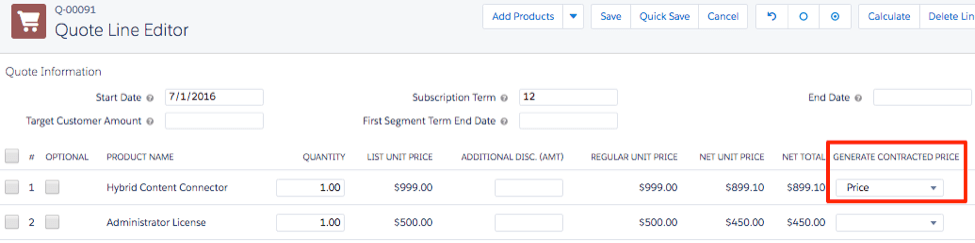
1. Set the General Contracted Field to Price
On a Quote Line, set the Generate Contracted Price field to “Price”. (This is a standard field as of Spring 16, but you’ll need to add it to the Quote Line Field Set you’re using.)
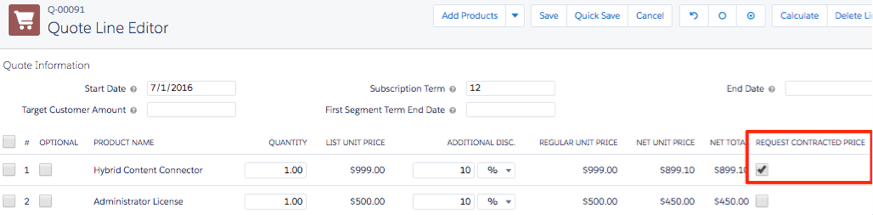
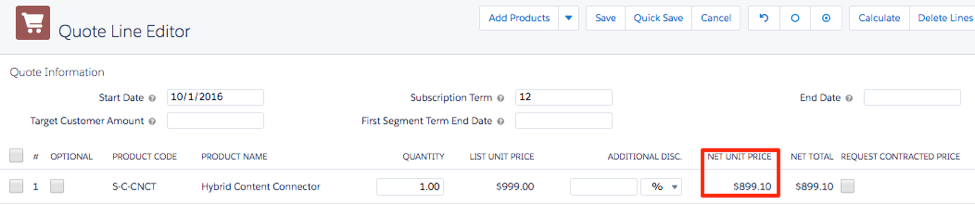
TIP: You can simplify the user experience for the Sales Rep by substituting a checkbox on the Quote Line rather than displaying the “Generate Contracted Price” picklist field. This is helpful if you don’t want to provide Sales Reps access to the option to create a Custom Discount Schedule along with Contracted Pricing. See below, I’ve added a checkbox labeled “Request Contracted Price”, which triggers a workflow to populate the Generate Contracted Price field with the “Price” value. This workflow might fire immediately or occur later, for example, after the Contracted Price has been approved by a Manager. As long as it fires before the Opportunity is Contracted, the Contracted Price will be created.
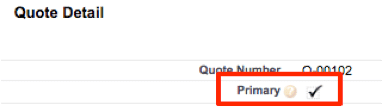
2. Set Quote as Primary Quote
Make certain the quote is set as the primary quote so it syncs with the Opportunity when saved.
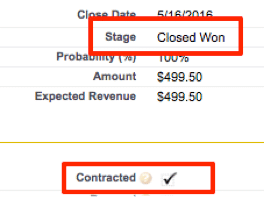
3. Set Opportunity Stage to “Closed/Won”
When Closing the Opportunity, set the Opportunity Stage to “Closed/Won” and be sure to check the “Contracted” checkbox so a Contract is created when these changes are saved. (This is usually done with a workflow.) Don’t forget to hit “Save”!
Check Your Work
Navigating to the Account Detail; you will now see several new records. If there were subscription products on the Opportunity, you will see Subscription records and a Contract record. If there were non-recurring products or services, these will be listed under Assets. And for those lines where Generate Contracted Price was set to “Price”, you will see that new Customer Contracted Price records have been created.

When the Customer returns to place an additional order for the same item, the Customer Contracted Price becomes the customer’s standard price. This means there is no need for any pricing approval, further streamlining the process of delivering a quote to your customer.
You did it!
Ensuring that a customer receives an agreed-upon price is important in maintaining a happy customer relationship. Now that these records can be created automatically, your sales reps can feel confident that the quoted prices always reflect the customer’s earned price. Never again will your sales team spend hours researching their sales history, and your valued customers are sure to receive the correct price whenever they return.
If you’re interested in more Salesforce CPQ tips and updates, subscribe to our blog. You can also read our other CPQ blogs here.