How to Track First Response Time on Salesforce Leads
One of the many challenges many sales and marketing teams face using Salesforce effectively is to be able to easily track how fast leads are being responded to by their sales teams. Salesforce, unfortunately, does not provide the easiest way out of the box to track how fast your sales teams are logging the first call or email to the prospect. How does one track first response time on Salesforce leads?

What we’re going to do is add a few fields to your lead object, a simple flow, and a simple process builder. But don’t worry, there’s a quick easy solution you can deploy and I’ll walk you through it step by step!
Step 1: Create Your Fields
What you’re going to want to do is create three fields as the placeholders we’ll use to begin to track and calculate our response time:
- Create a custom checkbox field, a suggested name would be RespondedTo (default unchecked)
- Create a custom Date/Time field, a suggested name would be FirstResponseDatetime
- Create a custom formula field, return type number, with one of these formulas*:
- FirstResponseDatetime__c – CreatedDate to calculate in days
- (FirstResponseDatetime__c – CreatedDate)*24 to calculate in hours
- (FirstResponseDatetime__c – CreatedDate)*1440 to calculate in minutes
*Note – Be sure to include your formula field on the lead layout so that you can see the time to First Response on the layout itself.
Step 2: Create a Simple Flow
Now that we have the plumbing available on the leads, we’ll need to send the water through…bad flow pun and all!
- Go to Setup > Search Flow in the quick find box > Click Flow
- Click new Flow
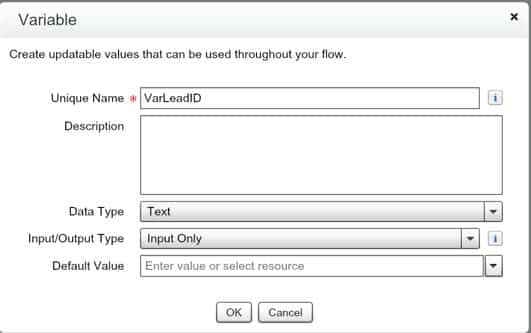
- Go to the Resources tab and double click on Variable to create a Variable as seen in this image:
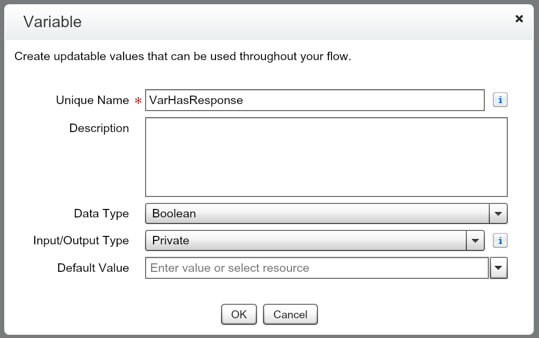
- Go back to the Resources tab and double-click variable again to create another variable as follows:
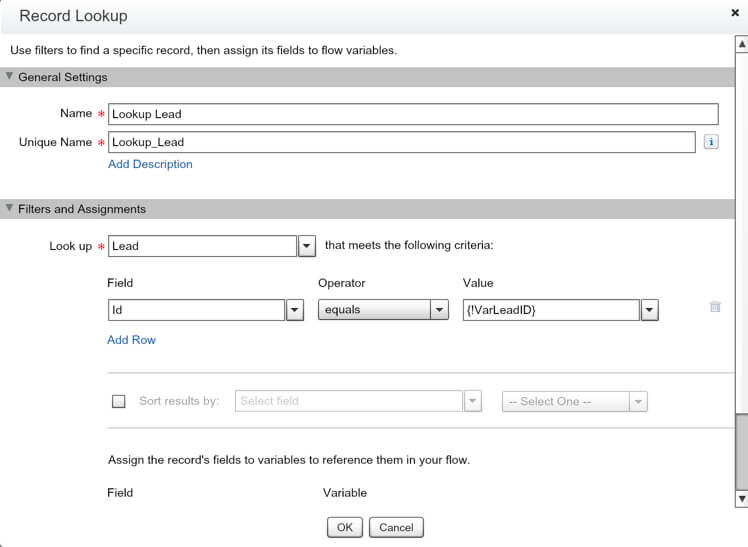
- Go to the Palette tab and drag Record Lookup onto the main blank screen of the flow. Fill in the popup screen as follows:
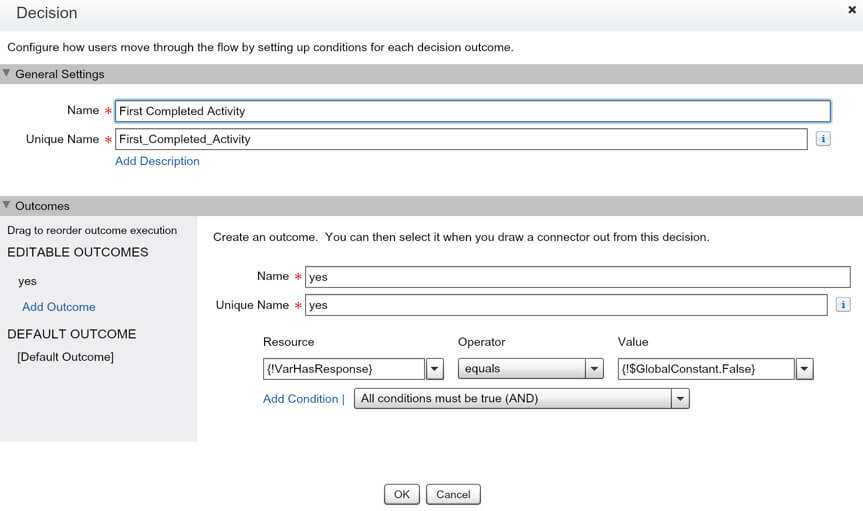
- Go back to the Palette tab and drag Decision onto the main screen of the flow to the right of the Record Lookup option. Fill in the popup screen as follows:
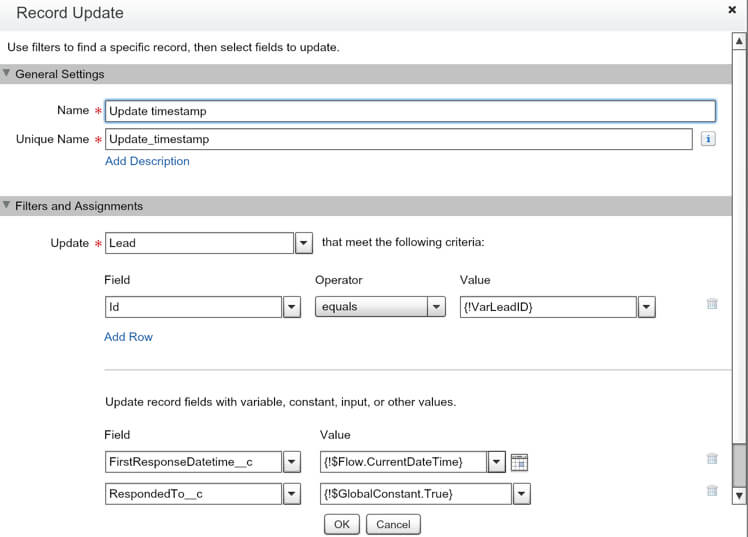
- Go back one last time to the Palette tab and this time drag over Record Update into the main screen of the flow to the right of the decision box and fill in the popup screen as follows:
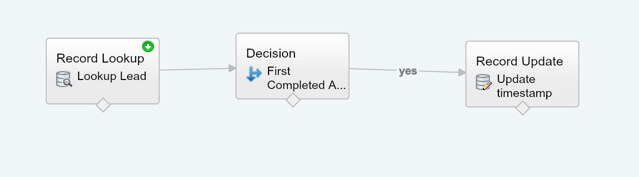
- Finally, within the flow, we’ll need to connect the three screens you’ve created by clicking on the diamond and dragging it over to the box to the right under the Record Lookup and Decision so you end up with a three-box setup that looks as follows:
- Save and name your flow.
Step 3. Create the Process Builder you’ll need to launch your flow
We have the plumbing, we have the water flowing, now we need to turn on the faucet by creating your process builder!
- Go to setup > search process in quick find > click on process builder.
- Click new process, and name your process whatever you’d like.
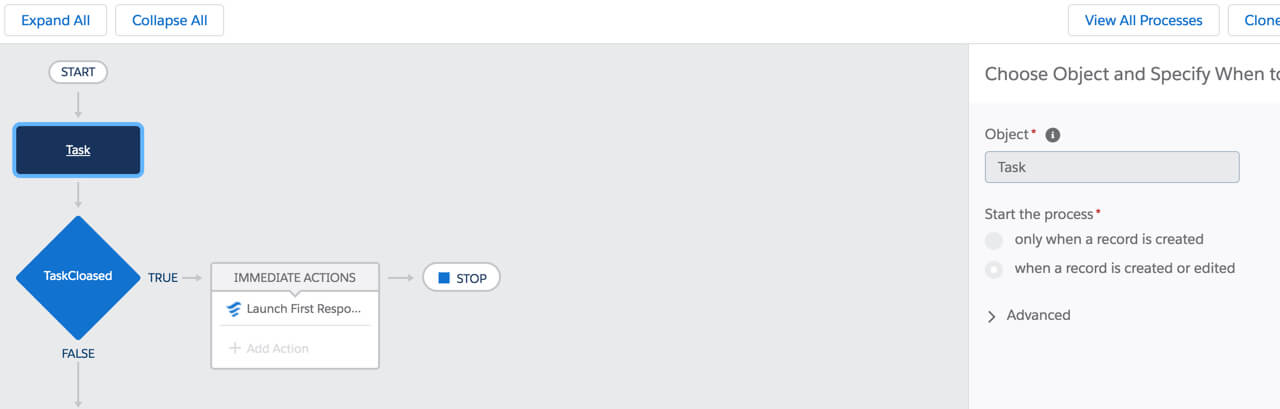
- Once inside the builder, click the object where the process will start and choose task and starts when a record is created or edited and hit save.
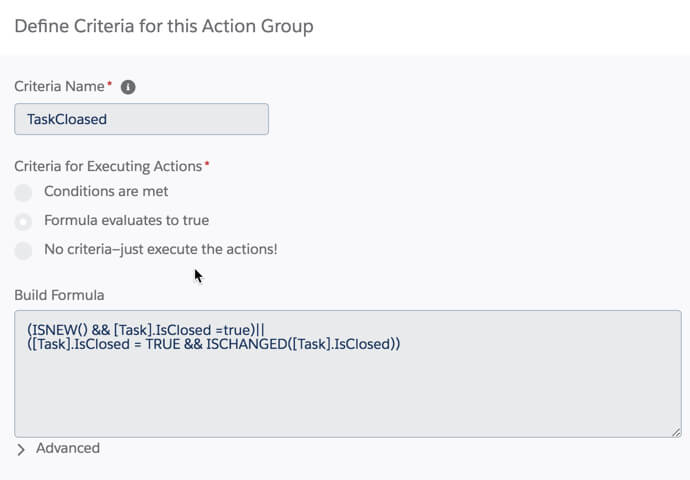
- Next, go to the blue diamond which is your criteria and click on it, and set your criteria as follows and save:
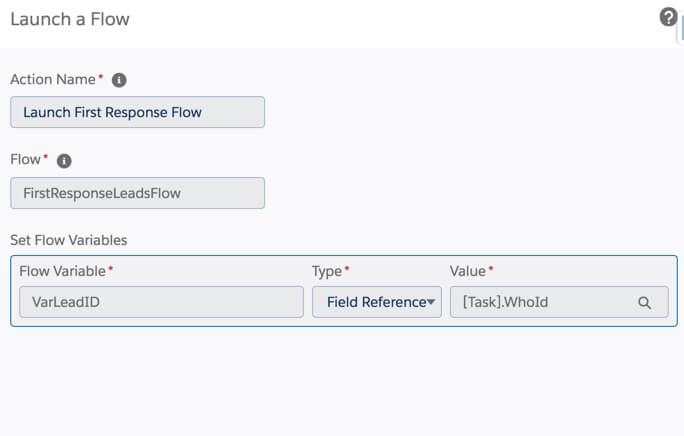
- Next, go to the immediate actions box and set to auto launch your flow as follows, being sure to set the WhoId for the variables after choosing your flow and save:
- Finally, go to the top right-hand corner and hit activate, to activate your process!
Ultimately while we walked through how to do this for leads, if you’re using Account Based Marketing (ABM), you could easily set this up to run on a contact using the exact same process and naming conventions. If you want to use it on accounts or opportunities if those were auto-created, you’ll need to change a “WhoId” reference to a “WhatId” and it would work there as well.
That’s it! You did it! Now you can move on to solve the next #AwesomeAdmin challenge your business teams throw at you or learn how we can help with your everyday Salesforce administration needs.