Going Mobile: Setup Salesforce1 in Less Than 30 Minutes
Are you interested in setting up Salesforce1 for your organization? Did you know that it allows you to access all of your Salesforce data and all Dashboards from your iPhone, Droid, BlackBerry or Windows device? Completing the Salesforce1 Quick Start Wizard and a few additional steps will have your users up in running in no time!
Walk through the instructions listed below to get your organization up and running on Salesforce1:
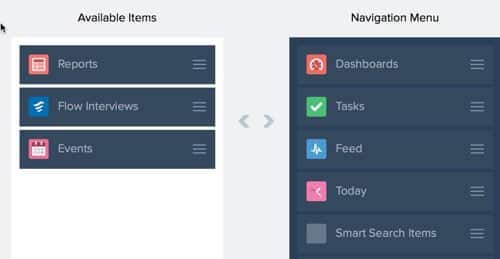
1) Launch the Salesforce 1 Quick Start Wizard by navigating to the Salesforce1 Setup. Once launched, the first step is to customize the Navigation Menu. Simply move available items over to the menu as desired. Items can be reordered by dragging them up and down. Keep in mind that the most often used items should show at the top of the list for ease of use.

2) Step two involves choosing and arranging Global Actions. Global Actions give users access to Salesforce functions such as Log a Note and New Account. These quick actions are critical to users looking to make updates on the go. If you add your own custom Global Actions later, remember to add them to the Global Publisher Layout so they show in Salesforce1.
3) The next step in the Wizard walks you through custom Compact Layouts for Contacts. These layouts show key fields such as name, email and phone at the top of the record detail to view critical information at a glance. Again, easily arrange and reorder available fields on your Compact Layout and click the Save & Next button. After you walk through the entire Wizard, you might take a few additional minutes to edit the layouts for other objects under Customize -> Object Name -> Compact Layouts.
 4) For the final step in the process, review all updates made through the live preview. This helpful view allows you to see your changes as they would appear on a mobile device and to make adjustments quickly through the Edit button as needed.
5) Congratulations! You have completed the Salesforce1 Quick Start Wizard and can now send invitations to your Salesforce users to gather feedback. Conveniently, there is a default subject line and message provided with the invitation but this can be customized to your liking as well. If you are undecided on who to send to at this time, you can always return to this screen and send at a later date.
6) Now that basic set up is complete, define the users who can access Salesforce1 to enable the mobile experience. There are two ways that users can do this: a mobile browser app that can be accessed through a support mobile browser and downloadable apps from the App Store or Google Play. To configure the mobile browser app, go to Salesforce1 Setup -> Mobile Browser Option. For downloadable apps, click Salesforce1 Setup -> App Security Controls.
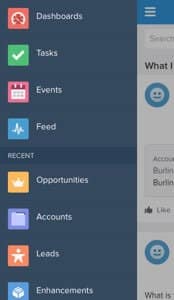
 7) If you have a few additional minutes to spare, we highly recommend branding your Salesforce1 app to match your company’s colors and logo. Make these updates under Salesforce1 Setup -> Branding -> Edit. Here is a preview from our app as a sample to follow:
8) One more thing to note. If you have Visualforce pages used in your system, these must also be enabled for Salesforce1 by clicking Develop -> Pages -> Edit and selecting “Available for Salesforce mobile apps.”
Increase productivity for your users by setting up Salesforce1 mobile access today. For more information, check out the Salesforce1 Mobile App Admin Rollout Guide.
