Custom Templates in the Force.com IDE
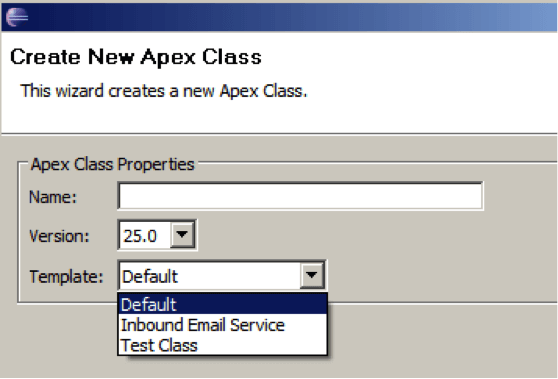
If you use the Force.com IDE to develop Apex code, you’ve probably noticed that when you start to create a new Apex Class, you see a dialog box like this:

If you look at the Template pull-down, you’ll see that you can specify what type of Class you’re going to create. Depending on which item you pick, the IDE pre-populates your new Class with different contents. For example, if you pick Test Class, your new Class is created with a sample test method already created. If you pick Default, your new Class is created with a minimal amount of code for a normal Apex Class.
The three Apex Class templates that come with the Force.com IDE are fine, but what if you want more? What if you want a template that makes it easier for you to create a Batch Apex Class, for example? And what if you want to customize one of the pre-configured templates – for example, if you want to define a standard comment block at the top of every Class?
Fortunately, you can create your own Force.com IDE templates, and even edit the pre-configured templates. You can also edit the templates that are used to create Apex Triggers, Visualforce pages, and Visualforce components.
To begin, find the folder where the pre-configured templates are defined. The easiest way to do this is to use the Windows Explorer to find the folder where your IDE is installed, then search for a file named ApexClass-Default.template. That’s the file containing the pre-configured “Default” template for new Apex Classes.
In this folder, you’ll see the following files:
- ApexClass-Default.template – for generic Apex Classes
- ApexClass-Inbound_Email_Service.template – for Apex Classes that implement Inbound Email Services
- ApexClass-Test_Class.template – for Apex Classes containing unit tests
- ApexComponent-Default.template – for Visualforce components
- ApexPage-Default.template – for Visualforce pages
- ApexTrigger-Default.template – for Triggers
- Scontrol-Default.template – for SControls
Open the ApexClass-Default.template file in your favorite text editor. It looks like this:

When the IDE uses the template to create a Class, it replaces @@NAME@@ with the Class name you enter in the dialog box when you create a Class using that Template.
Open ApexTrigger-Default.template in your text editor, and you’ll see:

The @@OBJECT@@ and @@OPERATIONS@@ variables reflect the Object Name and Apex Trigger Operations (like “before insert”) you enter when you create an Apex Trigger.
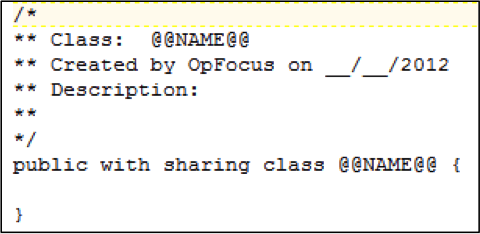
Changing the default templates couldn’t be easier – just start typing! For example, here at OpFocus, we always start our Classes with a standard comment block, so we’ve changed our ApexClass-Default.template file to look like this:

Creating a new template for Apex Classes is simple too – just copy one of the existing ApexClass template files to a new file, and edit away! The only trick is that the template’s filename must look like this: ApexClass-yourtemplatename.template.
When you’re done editing your templates, re-start your IDE, and your templates will be available for use! If you’ve created a new template file with a name starting with ApexClass– that template will appear in the New Apex Class dialog’s Template pull-down.
Now that you know how to edit and create templates, what templates do you plan to create? Let us know!


