Sales Path: Visualizing and Pacing Your Sales Process
In an earlier post, CRM 101: The Sales Process, I had explained that in order to use a CRM effectively, you must nail down your sales process. Today I want to share how Salesforce breaks down the abstract concept of a sales process into clear steps that leads to a closed won deal.
The Sales Path redesigns the Opportunity page on mobile devices (at least for now!) to contain the following features:
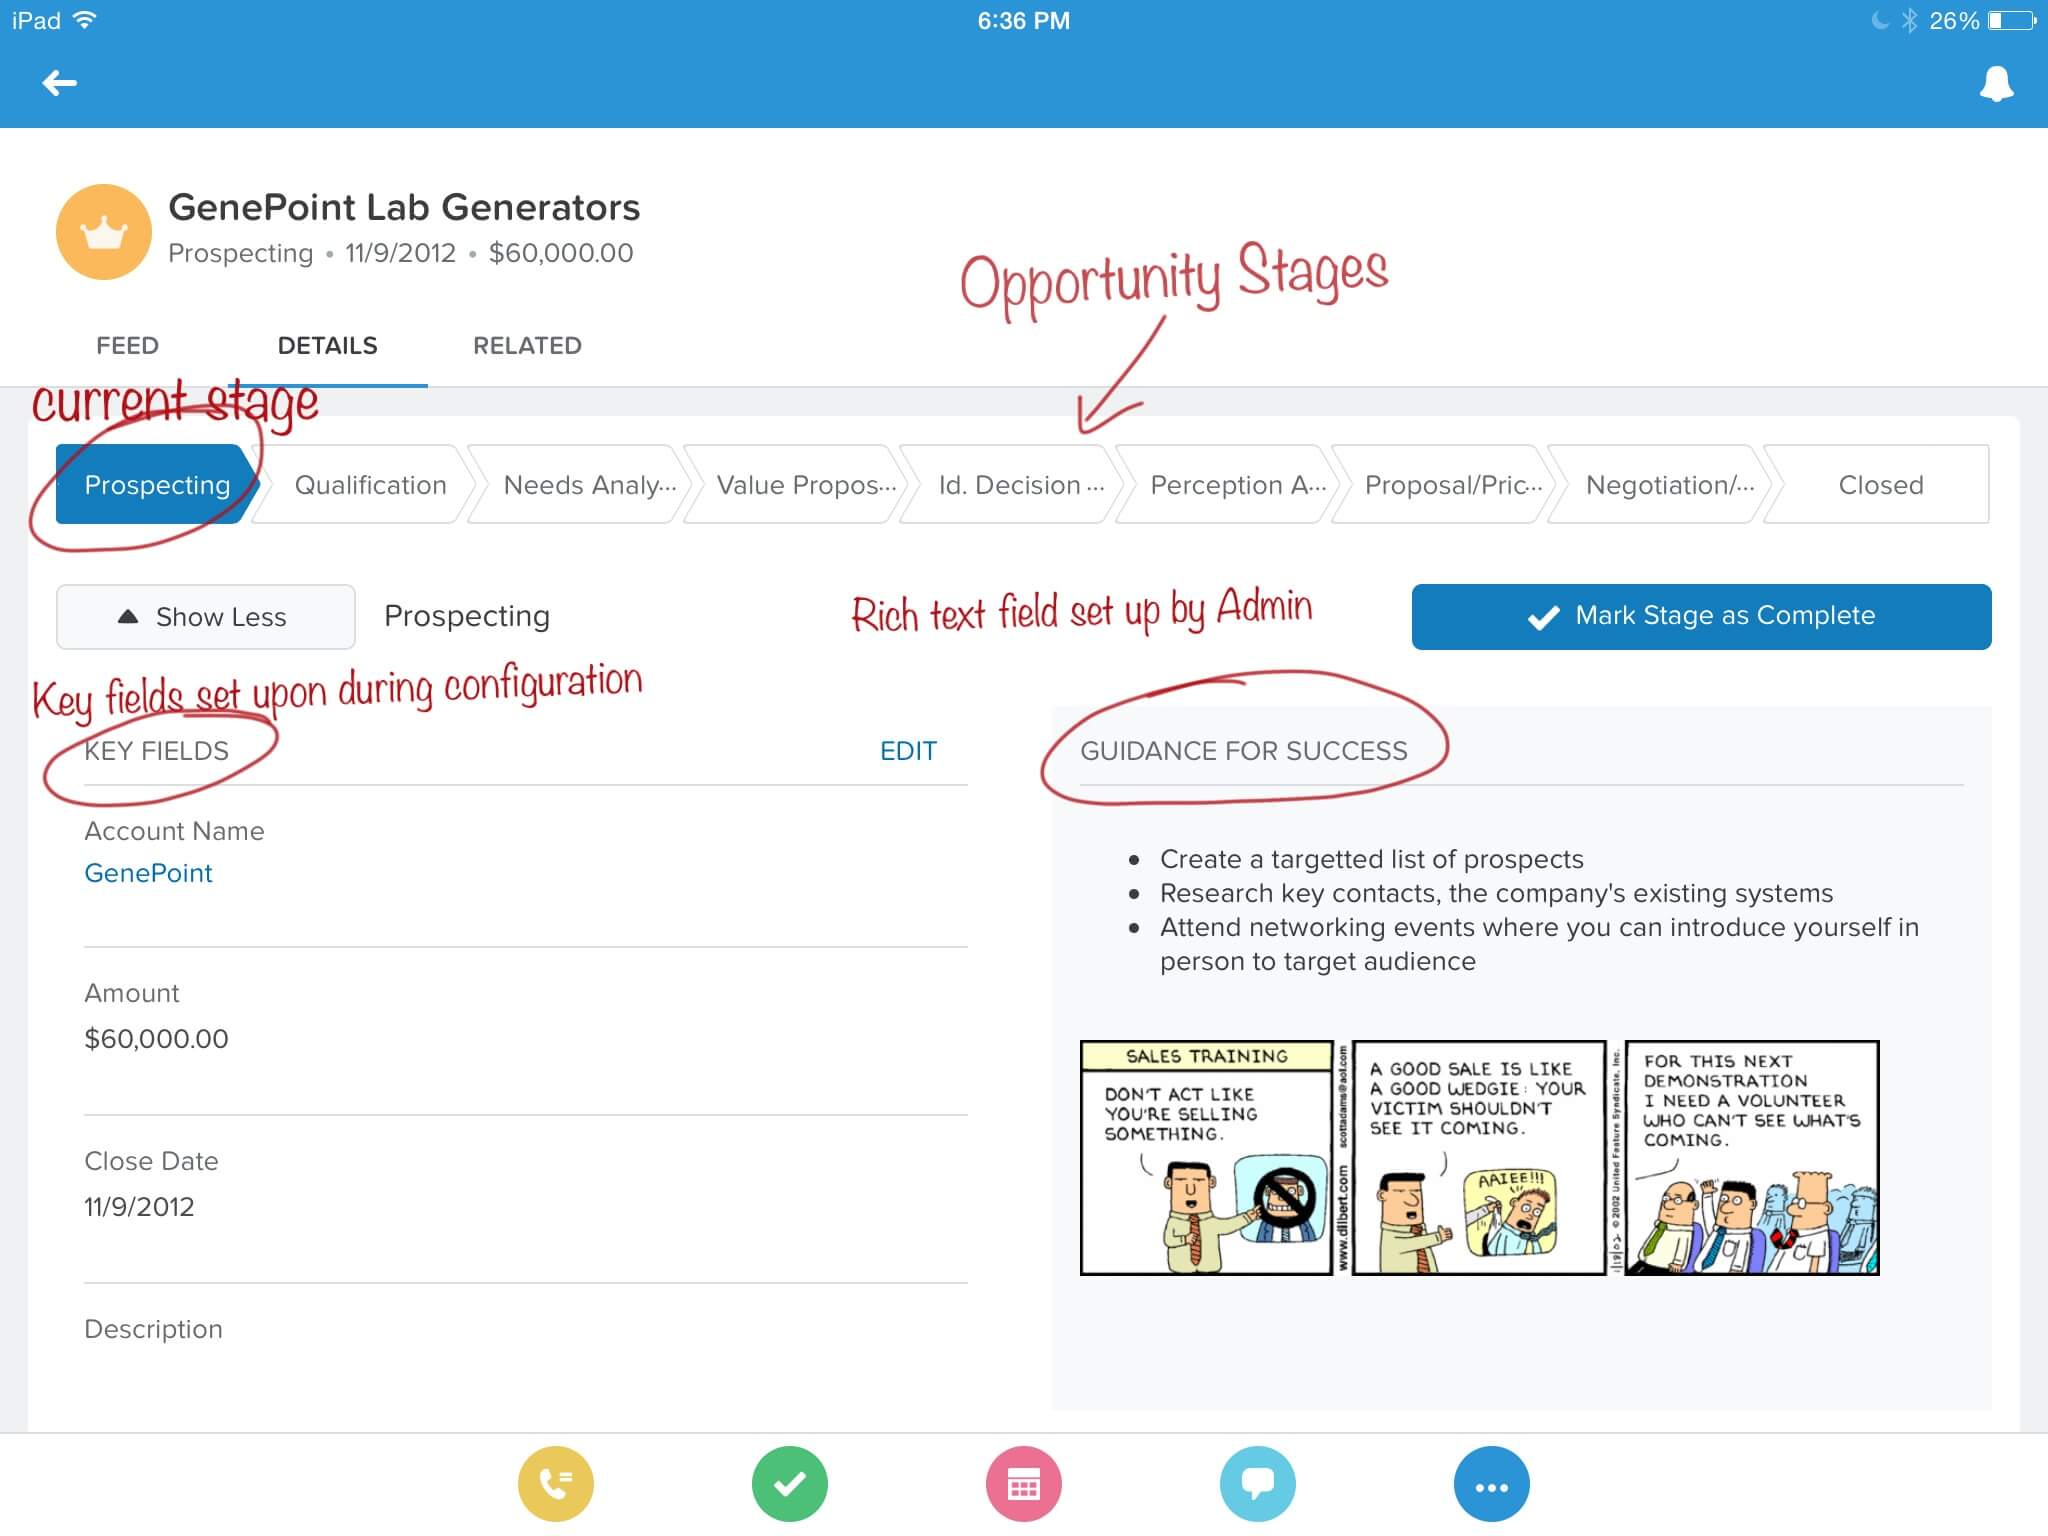
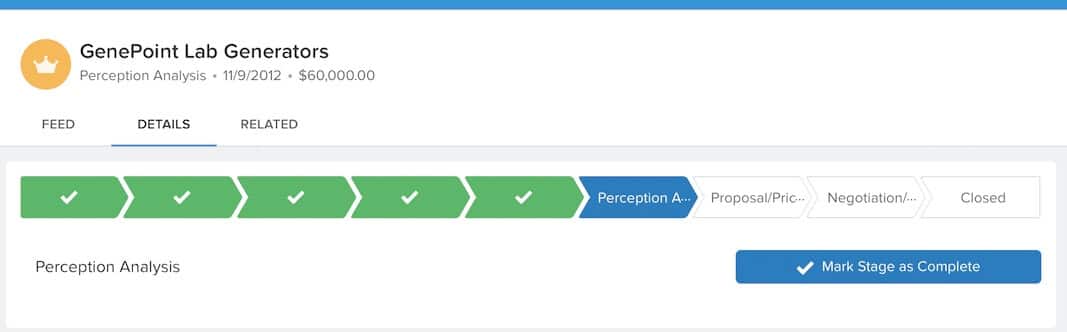
1. Visualizing Stages
Depending on the Record Type that is chosen by the Sales rep, the sales stages appear at the top of the page. One can see very easily how much of the path to success has been conquered and how much is remaining. The current stage can quickly be marked as complete which updates the stage then moves the rep to the next screen.
2. Simplifying each Step with Key Fields
The Key Fields are configurable for each step. This means that only the required or important fields can be placed up front and center for each step to minimize clutter. The rest of the fields you want the Sales rep to fill out are still accessible below the customized screen.
3. Guide Your Sales Rep to Success
If you have invested in customizing a sales methodology for your organization from Miller Heiman, Sandler’s, Kurlan etc or have leveraged an internal sales guru instead, the Sales Path presents the opportunity to implement the step-by-step guidance that can help sales reps check off some best practices checkboxes and push a deal forward effectively. The rich text field also allows you to put images for each stages which can also act as good visual queues to remind reps of what needs to happen in each stage.
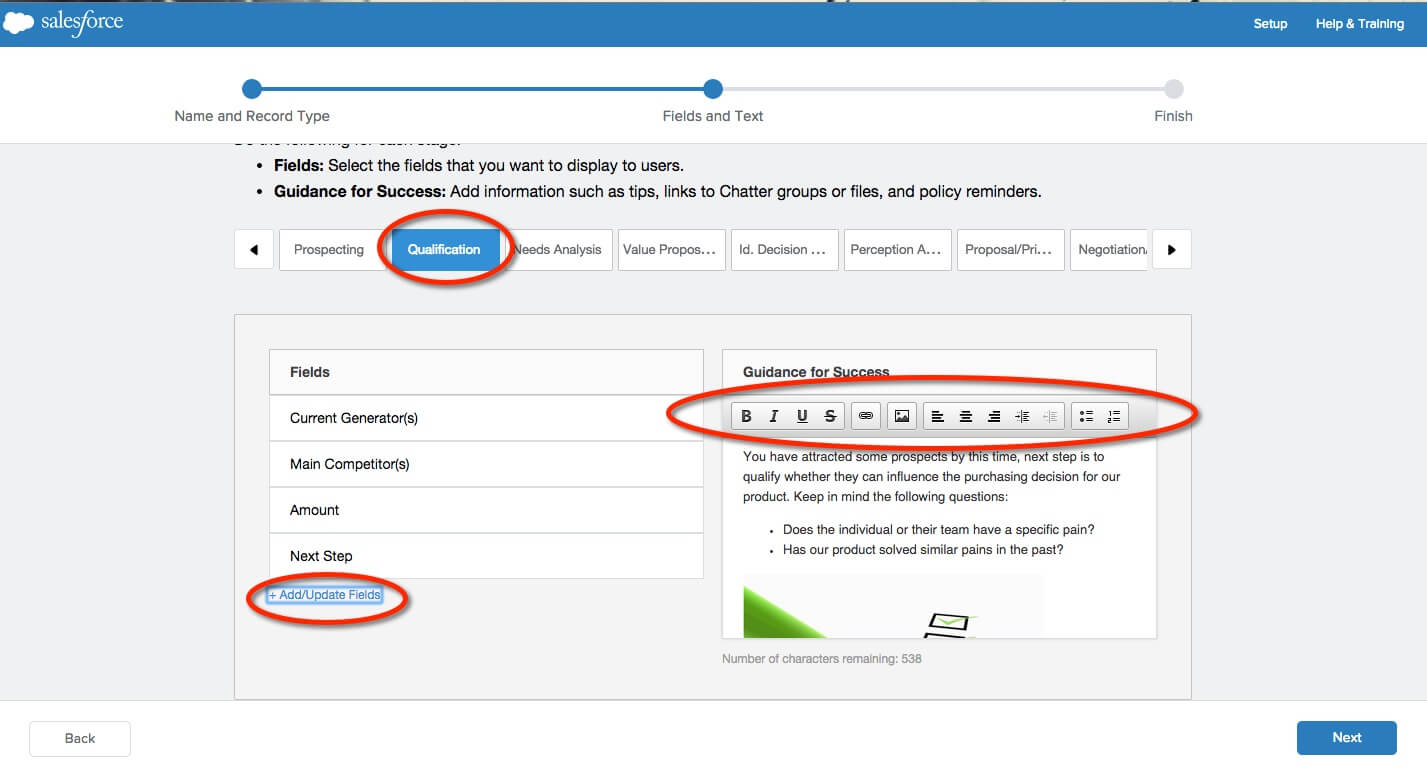
4. Setting Up Sales Path
So that’s all great. Now, how many nights does an admin have to stay up to set this up?
I would actually rank this as the feature that is the easiest to set up. The screen to configure and edit the Sales Path looks 90% like the UI. If you have configured Salesforce in the past, you know that this is not the case for any other features. This makes me very excited about how the science of the back end user setup for Salesforce is expected to evolve over the next few releases. One downside to keep in mind is that you cannot clone a Sales Path to make minor changes and then apply to each of the Record Types. Sad Face.
First off, ensure that Salesforce1 is set up for the organization. This takes 5 minutes and the step’s are listed on David Carnes’ article.
To set up Sales Path: navigate to Setup | Sales Path | Enable Sales Path and then are greeted by the screen below where you:
- Select a Record Type, which then pulls in the relevant Stages, and name the Sales Path
- On each Stage, pick 5 Key Fields and write out helpful tips, words of encouragement or add a picture!
And you are Done!